
How I shoot Mushrooms with Speedlites 18/07/2015
This weeks blog I'll cover how went about this shot I took this afternoon in the Australian Botanical Gardens, Mount Annan. The Gardens are a great place to practice photography and they actually hold several work shops in the gardens on photography. Any shots that are posted on social media the gardens request you credit them with the location the shot was taken, which is why each week I mention the shots were taken in the gardens, for those wondering why each week I mention that. The gardens also hold a photography commutation in the gardens each year in various categories, So any one interested in photography this really is a great location.
This week I thought I'd go over how I took this shot.
 This was taken this afternoon and follows the normal process I use to take my weekly mushroom shot for +ShroomshotSaturday, A google plus theme page on mushrooms photographed on Saturdays.
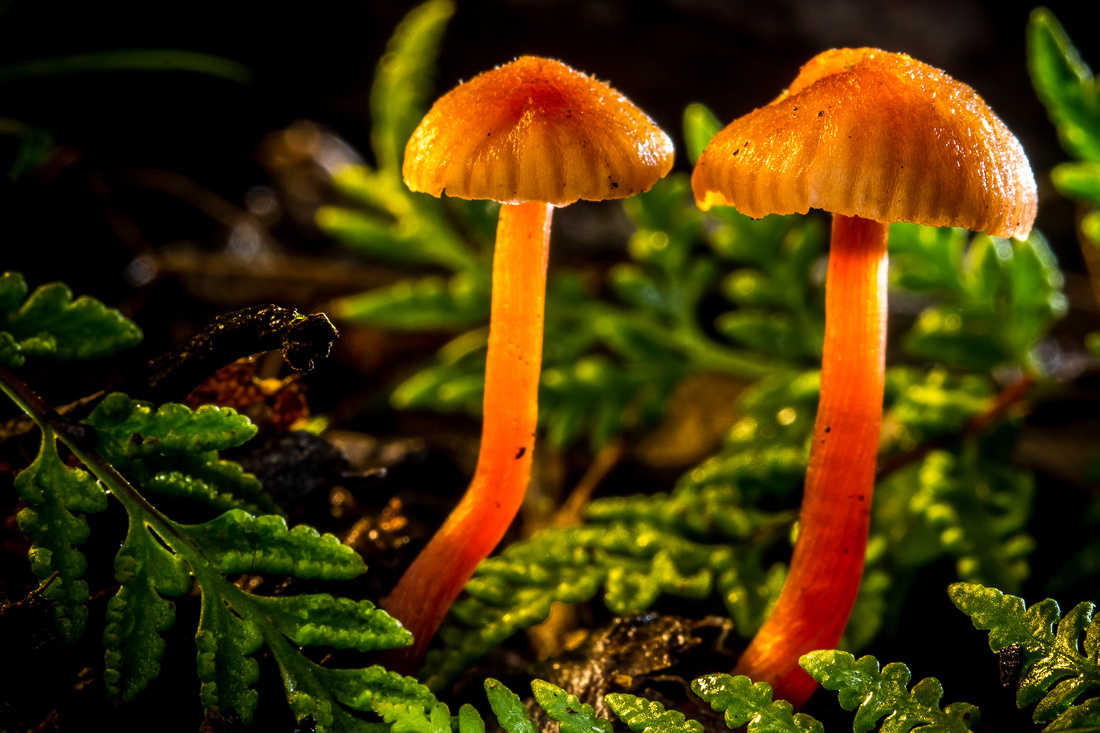
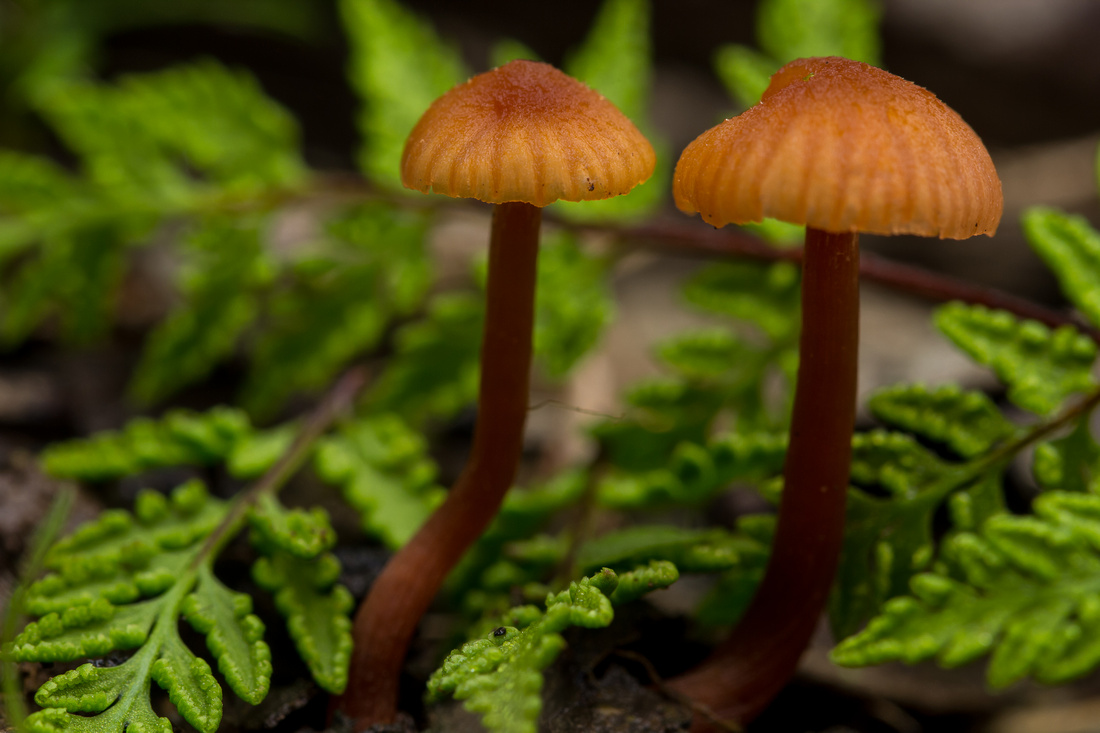
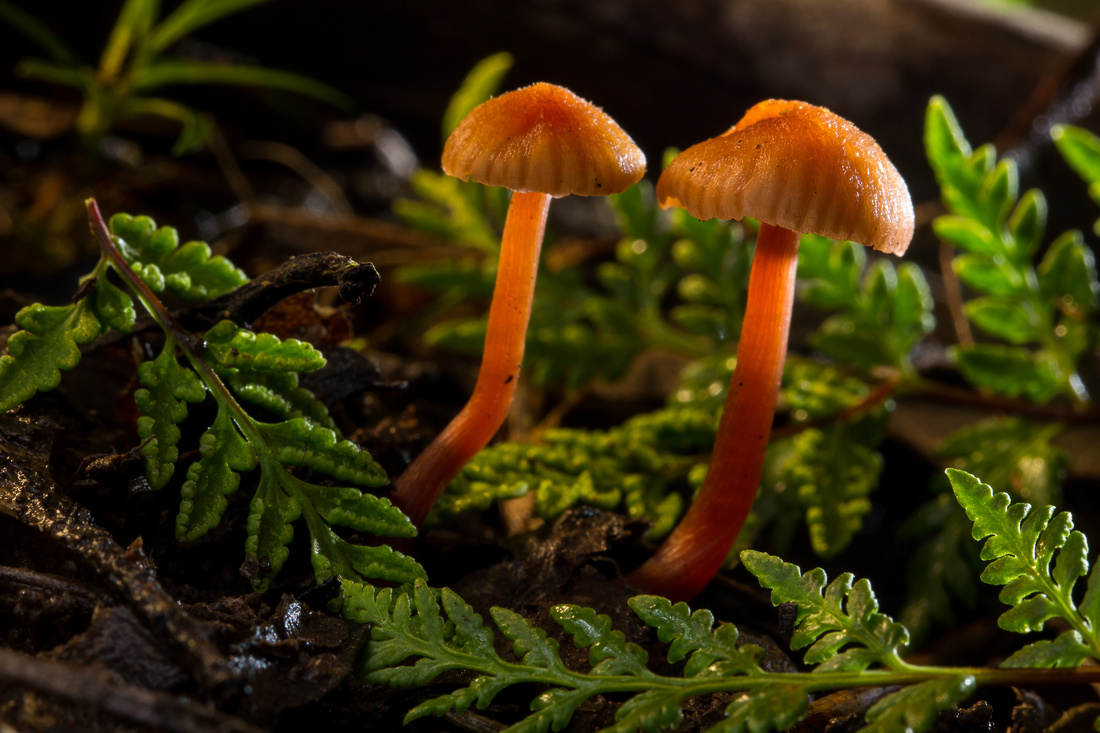
The shot was taken with a Canon 60D fitted with ehCanon 100mm F2,8L Macro lens. The shot is taken in normal daylight, The shot was taken at 4:00pm in the afternoon on an overcast day. These ones were found besides a walking track, after a few days of rain here in southwest Sydney. These little guys are quite small only about 6mm in diameter of the cap.
The first thing I do is frame up the shot, to do this I set up the camera on the ground often using my home made bean bag and some times a few blocks of wood to give extra hight as in this case. If I can get underneath the mushrooms I will to highlight the gills. In this case since they were so tiny I couldn't get underneath them. I'll set the exposure so I can see the mushrooms in the live view LCD and angle the screen so I can see it. (One of the big pluses of the Canon 60d the articulated screen) I'll frame up the shot then zoom in 10 times on one of the Caps and focus manually around 1/3 of the way from the front edge of the cap to the top of the cap, this point will give me the greater depth of field when I go for the final shot. I then take a test shot and see how it looks often zooming in to again check focus is OK and look for any stay items in the shot I may want to remove, often a stray leaf or blade of grass will need to be moved.
 I'll move any think in the way of the mushroom and reposition any greenery around the mushrooms to the best effect.
Once I'm happy with that then set the aperture to get the mushroom in full focus will keeping the background out of focus as mush as possible. I then set the shutter speed around 1/200 of a second which usually make the live view go black well under exposed and then stat to add in the lights.
Starting with the rim light or back light, I position the light to give the effect I want. which is to to give an edge light to the cap of the mushroom. This shot is only the rim light on, which is a plain unglued flash to the right rear in this case.
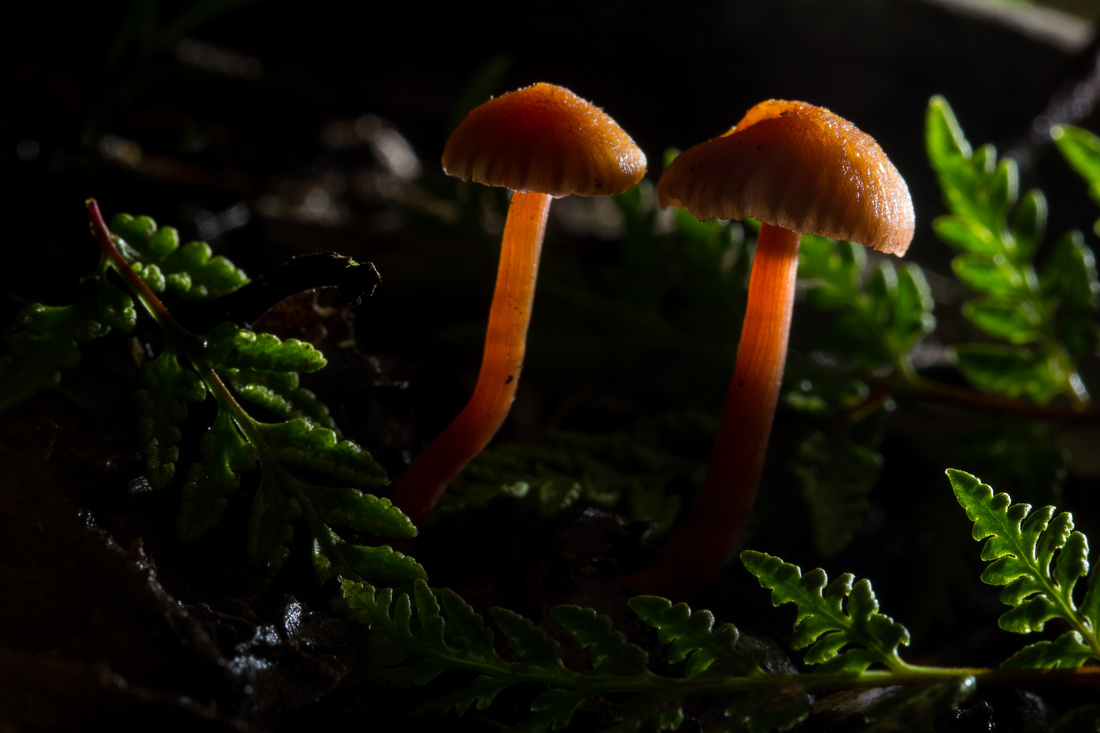 This often need to be adjusted to only light the mushroom and leave as much background unlite as possible. In this case I had to angle the flash head up a bit. Once happy with that I add in the second flash usually to the opposed side and 90 degrees to the camera, this is usually enough to light the mushroom while still giving it shadows to give it some three dimensional feel to it, rather than blasting it with light front on which tends to remove some of the death tot eh shot.
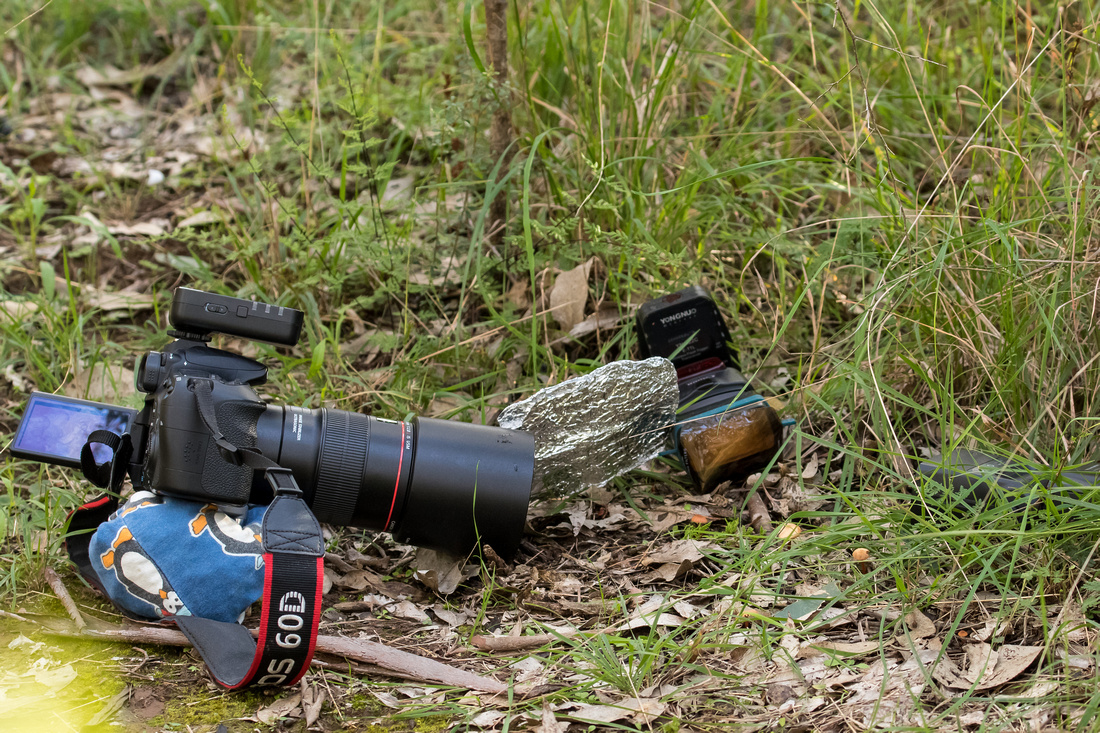
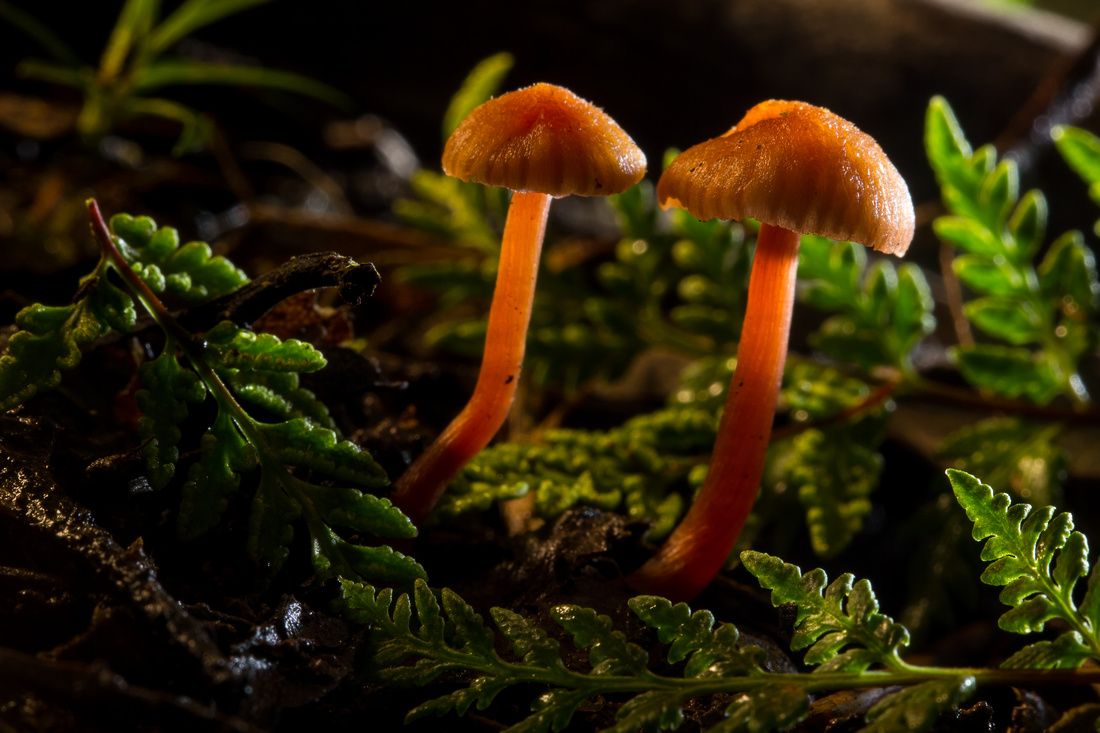 I'll take a shot and reposition the lights as need be to get he best effect in this case the light is actually a little behind the mushroom adding a little more edge lighting on the left, the front of the mushroom and the foreground is still a little dark, as I only have two flashes I then use a high tech piece of aluminium cooking foil about 10 cm square and use that as a reflector to reflect the plain flash back into the shot. This give the effect of a third light at less power and adds a bit of fill light on the front.
Heres two shots showing the set up on the ground where you can see the two flashes the reflector and the Camera not eh ground with the tilt screen angles so I can see. This is the actual lighting conditions the shot was taken in so as you can see a lot brighter than the image looks.

From here the shots pretty much done not much more to do out in the field, one final check of the shots no the back of the camera zoomed in on the LCD to check for focus and make sure nothings in the shot then head off home to play in light room.
In light room I'll First crop the image to make the mushroom as large as possible if not already so while removing any items to the edge of the shot thats distracting to the shot. I'll then reduce the highlight to make sure the rim lights not to blown out, I'll increase the contrast and clarity quite often a lot on the clarity ( in this case it didn't need to much, it depends on the mushroom), I usually increase the shadows a little bit and drop the blacks down, occasionally increasing the whites as well as in this shot, to add a light more brightness to the mid tones.
From there if the exposure needs any find adjustment I'll add or subtract as required then move down the development panel adding a little more to sharpness and adding a little more to noise reduction both basic and colour.
Finally I'll add a bit of a post-crop vignetting to dragon the edges and may add in a graduated filter as well to darken a side on the bottom of the shot, again to my taste. I check the image again and see if theres any areas that are to bring in the for ground usually any stray sticks or foliage that got to much flash and I'll use the local adjustment brush to take down the exposure about half a stop or so, just to take the brightness away for all but the main subject. I'll check the Cap of the mushroom and may add in a Radius filter just over the cap and slightly increase the exposure to bring up the brightness there. and a final check to make sure theres no sensor dust spots or other distracting areas that need cloning out and then the image is done.
So a bit of work in each shot both in the field and on the Computer, the computer time is around ten minutes these days as I've pretty much got that sorted out, the field time may be up to half an hour to get the lights in the right place, trying out left and right locations and any other options I think will work. the hard part is when I get back sorting out which image is the best for the week, as I'll often have several subjects I've taken and several shots to sort though of each.
Hope you found this helpful and and a bit of an inside to how I go about these shots each week. Happy to answer any questions any one may have just leave a comment on this post and I'll respond in time. This is only my hobby so I'm still working my way around these things as well still learning here.
Thanks for dropping my my blog check back next week for more.
Glenn.
